How to paint your house
With a little bit of effort, your house can look as good as new
Spotting and correcting problems with your home’s exterior can not only boost curb appeal; it can prevent bigger issues from forming. Even a small touch-up exterior paint job can improve your house’s appearance without breaking the bank.
You don’t want to walk into a hardware or paint store with vague ideas and no plan in place. So, how do you go about making some touch-ups? Here are a few tips to help you plan and execute an exterior paint job to keep your house looking great.
Step 1: Inspection and repair
Your exterior painting job begins before you grab a paintbrush and caulk gun. Kick off phase one of your exterior painting mission by grabbing a notepad and inspecting the outside of your home. Jot down what needs to be done, and use your notes to set a plan for tackling the project.
Before you get started, look for the following trouble areas and make any necessary repairs before applying a new coat of paint:
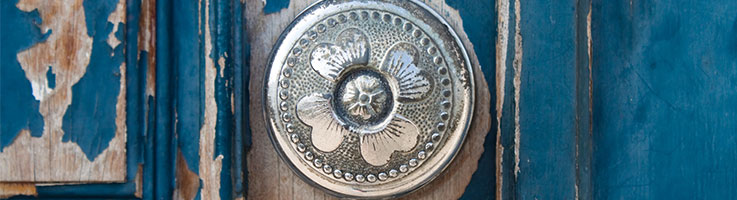
- Find the trouble spots: Inspect the siding or trim for peeling or flaking paint. These fixes are some of the easiest you can do. Also look for any shortcomings with painted metal, such as compromised coating, rust on iron railings or efflorescence (powdery white residue) on aluminum siding, soffit or trim. You’ll take care of these sections during prep work.
- Mildew and mold: Look for any spots where mold or mildew has taken hold. If the damage isn’t too extensive, you should be able to remove it yourself. Get rid of mildew and mold by scrubbing the surface using a bleach solution. When you’ve scrubbed it, let it sit for about 10 minutes. Then, use a garden hose to wash away the suds and residue. If you don’t feel comfortable tackling mold removal yourself, find a mold removal professional to handle it for you.
- Gaps in doors or window sills: Look at the areas where different materials meet and note if the caulk is missing or deteriorated. These gaps in your home's exterior are not just eyesores. They can let cool air or heat escape, driving up your electric or gas bill. They can also let water seep in and cause serious damage. Repair these areas by applying a bead of caulk with the caulk gun. Smooth it out with your finger or a putty knife to create a tight, protective seal.
- Check for rotten wood: If you’ve noticed any rotting wood on your home’s exterior paneling, you’ll want to replace it before you start painting. Measure the area where the rot begins and ends. Starting about an inch past where the rot ends, use a wood saw to remove the piece from the house. Measure the piece you removed, or take it to a home repair store to cut a matching piece. Affix the new piece to the area with nails or screws. Sand it down to make sure it matches your house evenly.
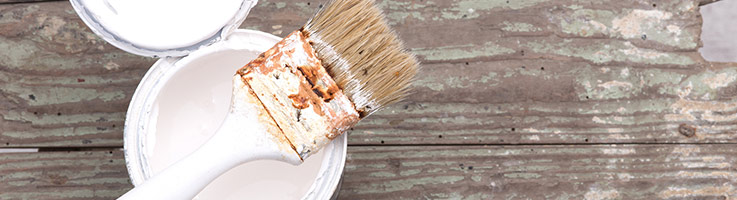
Step 2: Prep work
Once you’ve completed your inspection and made your repairs, you’re ready to choose your paint and prep the area. Follow these steps to make sure you have all the right materials and to set up your work area.
- Pick your primer: When you pick your primer, choose one with a vinyl sealer. A vinyl sealer will help the primer and paint stick to the surface. However, if you're just adding a fresh coat of the same color paint, you do not have to prime the surface.
- Pick your paint: The best paint for your exterior is 100 percent acrylic latex. Acrylic latex bonds to rough surfaces more easily than any other type of paint.
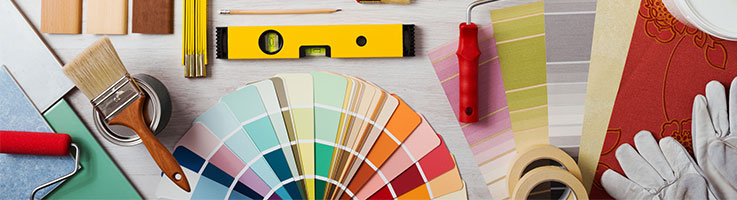
- Consider your color carefully: Consult your local homeowner’s association or neighborhood authority to note any restrictions on colors in your area before you start paint shopping. When choosing an exterior paint color, remember that vibrant colors will fade more quickly than muted ones. Choose a color that compliments your roofing and any exterior stonework. A popular color like eggshell will go with almost any stonework, brick or roof. Bright, vibrant colors will compliment a dark roof or muted stonework. Take some paint swatches and samples with you to test how the paint will look.
- Gather your painting tools: To get started painting, gather all the tools and materials you’ll need. Some basic items are: brushes, rollers or sprayers; painter’s tape; drop cloths; paint scraper; sanding block or sandpaper; and plastic sheeting.
- Scrape away any flaking paint: Before you paint, make sure your surface is as smooth as possible. Use your paint scraper to remove any flaking or damaged paint.
- Smooth out corroded metal: Use sandpaper or a sanding block to smooth out any corrosion on metal surfaces. If the rust is more than the sandpaper can handle, use a rust remover like Rustoleum. Rust removers are available at most hardware stores.
- Wash the exterior: Wash the exterior to knock away the dust or flecks of old paint before adding your paint or primer. Power washers can make quick work of washing an exterior. Otherwise, water, rags and elbow grease will do the trick.
- Add tape to trim and cover fixtures: Use painter’s tape to line any trim areas like window sills and doors. This will keep you from accidentally painting over areas that call for a more delicate touch. You’ll also want to cover any fixtures like outdoor lights with plastic sheets to protect them from paint splatter.
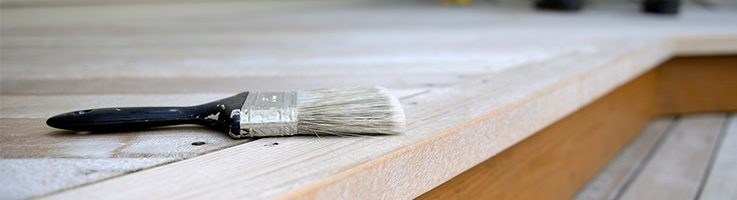
Step 3: Start painting
Now that you have your area cleaned and prepped, it’s time to start painting! Most house exterior painting projects call for two layers of paint. Though it may add a bit more to the material cost, two coats of paint can mean the difference between your paint job staying fresh for years or fading after a few seasons.
- Begin with primer: You only need primer if you are using a new color of exterior paint. A layer of primer will help the new paint color stick to the wall. Paint a single, thin layer of primer on your exterior from top to bottom. Then, allow the primer enough time to dry before adding your new layer of paint.
- Add the first layer: After the primer has dried, you’re ready to add the first layer. Depending on the size of your project and painting area, you can use a paint sprayer, a roller or a brush. Work from top to bottom to catch any drips. Work slowly and deliberately, and overlap each stroke by six to eight inches to keep the coat even.
- Follow up with a second layer: Allow the first layer to dry, then follow it with a second layer of paint. This layer will help the color remain bold and be more resistant to weather and fading. Just like the first layer, always paint from top to bottom to ensure a smooth coat and minimize the drips.
- Time for detail: Once you have all the big sections completed, remove the painter’s tape and paint the trim and other details. When you’re painting doors, fascia, windows, shutters, molding and whatever else needs a touch-up, your best tools are a decent brush and a steady hand. There’s no secret to painting detail other than to take your time.
|
|
|
Bottom line
Painting your home's exterior doesn’t just keep it looking nice. Regular upkeep can help protect your house from the wear and tear of time. Paint can provide a protective barrier for the wood and metal of your exterior. Whether you’re preparing your house for the market or just want to keep it in shape, you can improve your exterior with a little bit of extra care.
You’re signed up
We’ll start sending you the news you need delivered straight to you. We value your privacy. Unsubscribe easily.